Integrating Superwall in your Flutter App
Get configurable paywalls presenting in just a few minutes in your Flutter apps by following these three steps.
Integrating Superwall into your Flutter app is a straightforward, three-step process — and it mirrors the experience of adding Superwall to an iOS or React Native project. In this guide, we'll walk through everything you need to get configurable paywalls presenting in just a few minutes.
The three steps are:
- Installing Superwall's SDK
- Configuring the Superwall client inside a Flutter project
- Presenting a paywall by registering a placement
This guide assumes you've already created a Superwall account and added your products from App Store Connect or Google Play. The minimum requirements are iOS 14 and Android SDK version 26.
Install the SDK
There are two ways to install the SDK. You can add
superwallkit_flutter as a dependency in your project's
pubspec.yaml file:
dependencies:
  flutter:
    sdk: flutter
  # Add this:
  superwallkit_flutter: ^2.0.0
Then fetch the package via the terminal:
$ cd documents/myFlutterProjects
$ dart pub get
Alternatively, you can install it directly from the command line:
$ cd documents/myFlutterProjects
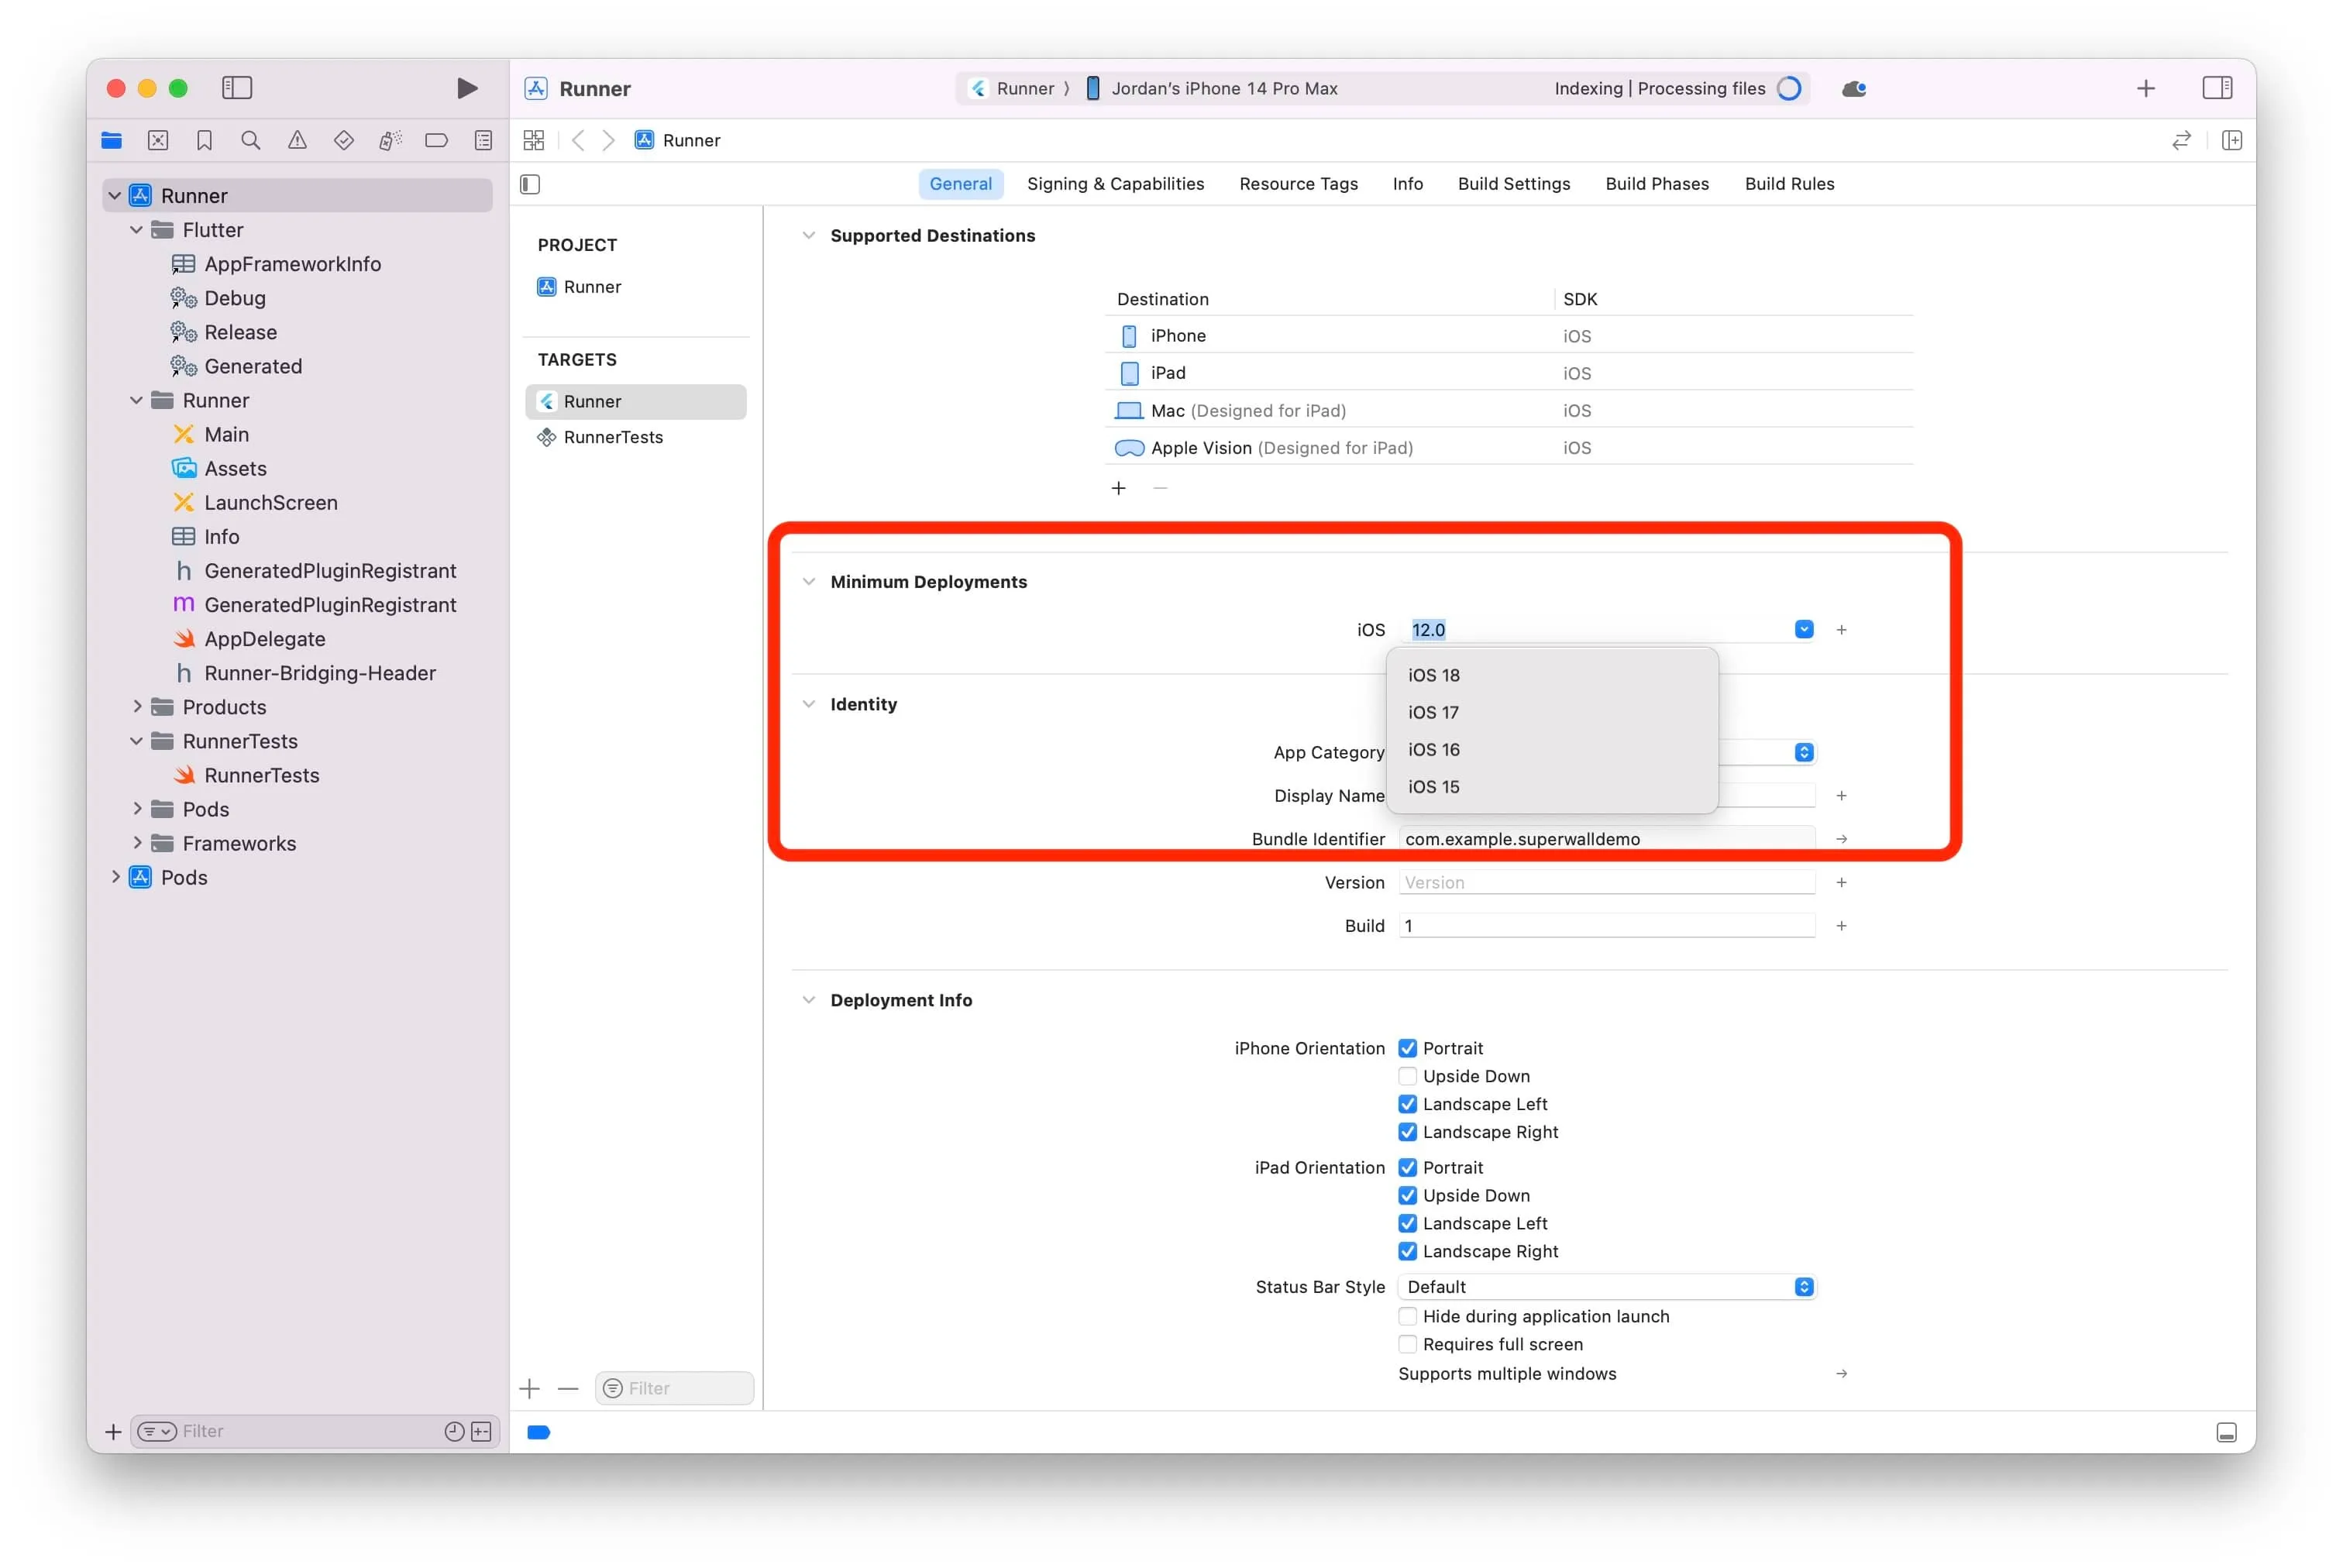
$ flutter pub add superwallkit_flutteriOS Deployment Target
Superwall requires iOS 14 or above. Update your project's
podfile (located at
MyFlutterProject -> ios -> podfile) by adding or
updating the platform specification:
platform :ios, '14.0'If your iOS dependencies haven't been installed yet, run:
$ cd documents/myFlutterProjects/ios
$ pod install
The Xcode project's minimum deployment version should match the
podfile setting.
Android Configuration
Android setup requires:
- Minimum SDK Version: 26 or higher
- Compile SDK Target: 34
Update the android/app/build.gradle file:
android {
    ...
    compileSdkVersion 34
    ...
    defaultConfig {
        ...
        minSdkVersion 26
        ...
    }
}
For SDK target 34, the following versions are required:
- Gradle Version: 8.6 or higher
- Android Gradle Plugin Version: 8.4 or higher
Update gradle/wrapper/gradle-wrapper.properties:
distributionUrl=https\://services.gradle.org/distributions/gradle-8.6-bin.zipUpdate android/build.gradle:
plugins {
    id 'com.android.application' version '8.4.1' apply false
}
Verify Installation
Build and run the project to ensure everything installed properly:
$ cd documents/myFlutterProjects
$ flutter run ios
Configure Superwall
Open main.dart (typically located at
lib -> main.dart) and import Superwall:
import 'package:superwallkit_flutter/superwallkit_flutter.dart';Call configure on Superwall with platform-specific API keys:
String apiKey = Platform.isIOS ? "MY_IOS_API_KEY" : "MY_ANDROID_API_KEY";
Superwall.configure(apiKey);
Here's a complete code sample:
import 'dart:io';
import 'package:superwallkit_flutter/superwallkit_flutter.dart';

class _MyAppState extends StatelessWidget {
  @override
  void initState() {
    String apiKey = Platform.isIOS ? "MY_IOS_API_KEY" : "MY_ANDROID_API_KEY";
    Superwall.configure(apiKey);
  }

  // Rest of app code
}
Your API keys are available in the Superwall dashboard. Select your iOS or
Android app, then navigate to
Settings -> Keys -> Public API Key.
Present a Paywall
Register a placement with Superwall to trigger a paywall. By default,
campaigns include a built-in placement called
campaign_trigger:
void registerDemoPlacement() {
Superwall.shared.registerPlacement('campaign_trigger', feature: () {
// access pro feature
});
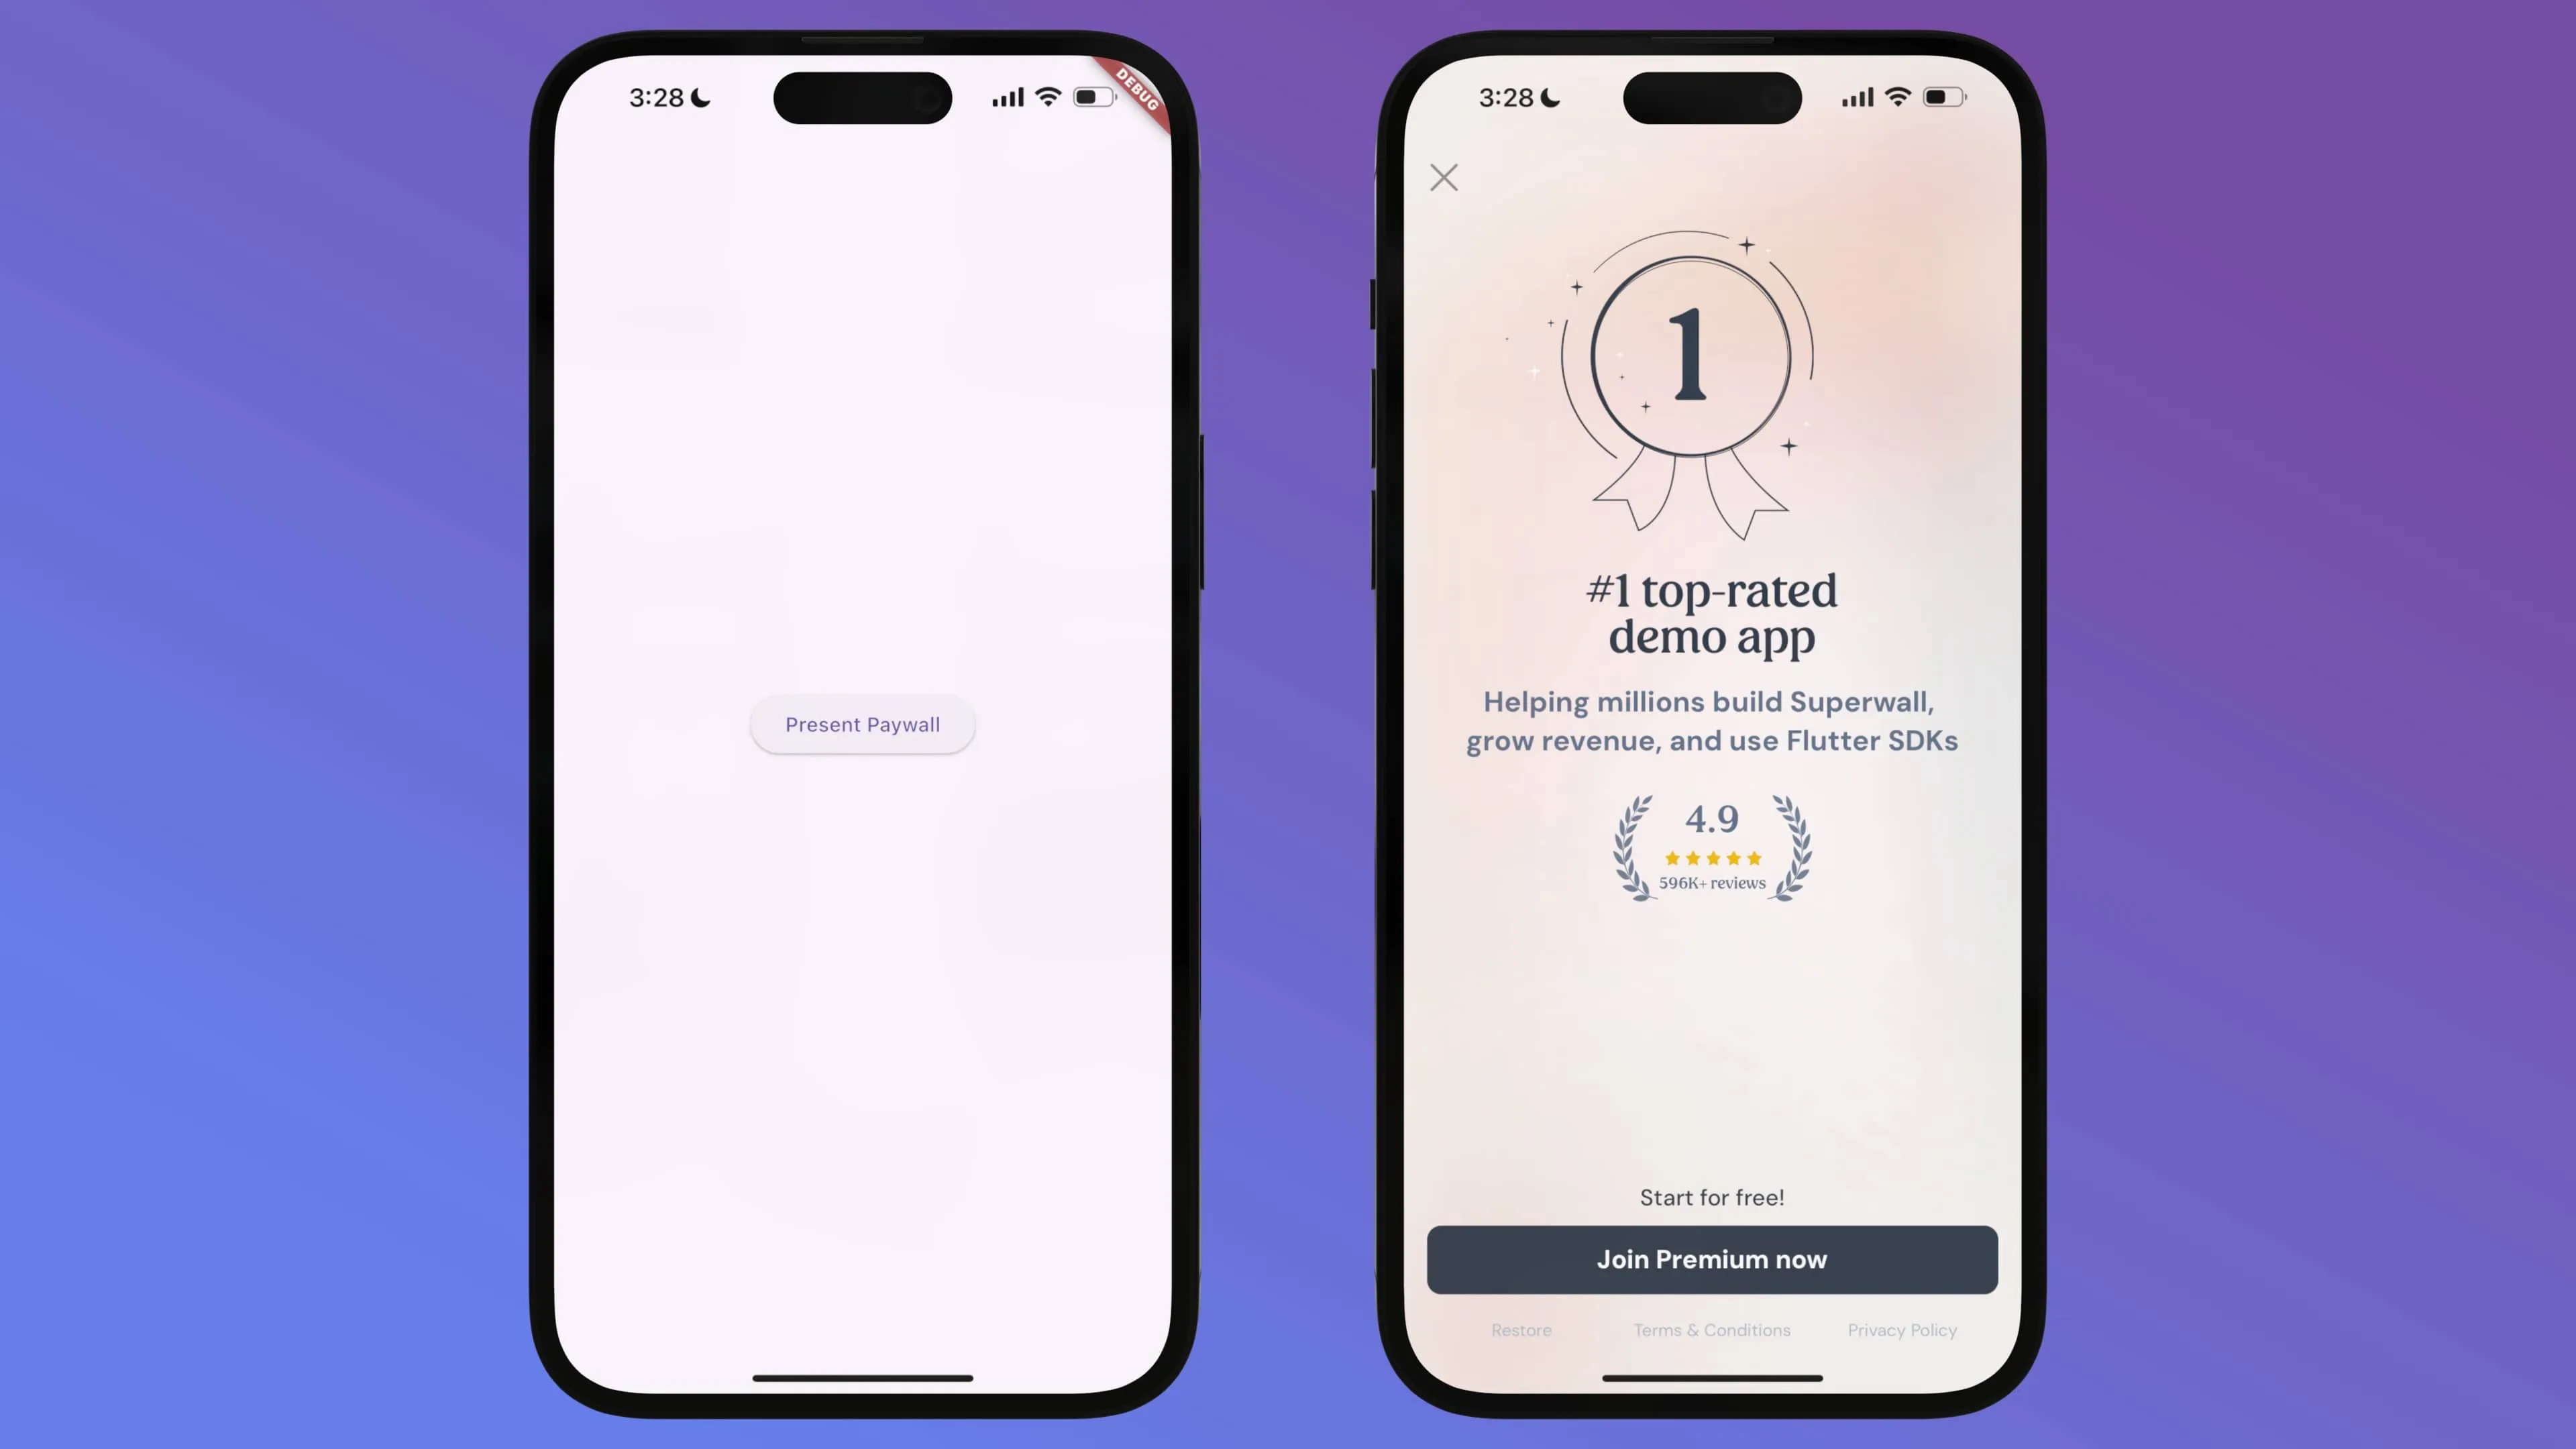
}When the button is tapped, a default paywall will display.

Complete Example
Here is the entire source code for the project's main.dart file:
import 'package:flutter/material.dart';
import 'package:superwallkit_flutter/superwallkit_flutter.dart';
import 'dart:io';

void main() {
  runApp(const MyApp());
}

class MyApp extends StatefulWidget {
  const MyApp({super.key});

  @override
  _MyAppState createState() => _MyAppState();
}

class _MyAppState extends State<MyApp> {
  @override
  void initState() {
    super.initState();
    String apiKey = Platform.isIOS ? "MY_IOS_API_KEY" : "MY_ANDROID_API_KEY";
    Superwall.configure(apiKey);
  }

  void registerDemoPlacement() {
    Superwall.shared.registerPlacement('campaign_trigger', feature: () {
      // Access pro
    });
  }

  @override
  Widget build(BuildContext context) {
    return MaterialApp(
      home: Scaffold(
        body: Center(
          child: Column(
            mainAxisAlignment: MainAxisAlignment.center,
            children: [
              ElevatedButton(
                onPressed: registerDemoPlacement,
                child: const Text('Present Paywall'),
              ),
            ],
          ),
        ),
      ),
    );
  }
}
Understanding Placements
Superwall paywalls are triggered through specific actions called placements. These markers indicate features that require a subscription or "pro" entitlement to access.
Paywalls are displayed based on placements tied to campaigns, and each campaign can have multiple paywalls linked to it. In a caffeine-tracking app, for example, placements might include:
- When caffeine is logged:
caffeineLogged - When selecting a custom icon:
customIconSelected
This approach gives you the flexibility to remotely control feature access and paywalls without requiring app updates. You can pause placements, make paywalls "non-gated," and set up complex filters and rules to determine when placements should trigger.
When you create an app in Superwall, an example campaign and placement are provided as a foundation. Additional details are available in the official documentation and on our YouTube channel.
Conclusion
That's all it takes — minimal configuration to integrate Superwall into your Flutter project. If you have any questions while implementing it, support is available through our official channels and on social media.
FAQ
- How do I add the Superwall SDK to a Flutter app?
- Add superwallkit_flutter as a dependency in your pubspec.yaml and run `dart pub get`, or install it directly with `flutter pub add superwallkit_flutter`. Then set your iOS deployment target to 14.0 in the podfile and configure Android with a minimum SDK version of 26 and a compile SDK target of 34.
- What are the minimum platform requirements for Superwall on Flutter?
- Superwall on Flutter requires iOS 14 or above and Android SDK version 26 or higher, with a compile SDK target of 34. For SDK target 34 you also need Gradle 8.6+ and the Android Gradle Plugin 8.4+.
- How do I present a paywall in Flutter?
- Register a placement with Superwall.shared.registerPlacement, passing a placement name (campaigns include a built-in campaign_trigger placement by default) and a feature closure. When the placement is registered, Superwall decides whether to show a paywall based on your campaign rules.
- What is a placement in Superwall?
- A placement is a named action in your app that can trigger a paywall, such as caffeineLogged or customIconSelected. Placements are tied to campaigns, letting you control which features are gated and when paywalls appear — all remotely, without shipping an app update.