Custom Paywall Presentation in iOS with the Superwall SDK
Learn how to show paywalls in an embedded call-to-action, navigation controllers, in custom sizes or containers, and more.
For many apps, Superwall's built-in presentation options will be more than enough. Full modal presentations, "navigation" pushes, sheets, and more cover most use cases.
But, what about those times where you need a custom presentation? The Superwall SDK has support for that too, and in this post — I'll show you how it's done on iOS. Specifically, in a SwiftUI app using UIKit wrapped controllers, and using a SwiftUI view type.
To learn how, we'll cover how to take full control of the paywall presentation pipeline to:
- Push a paywall onto a native
NavigationStack -
And, embed a paywall in another
Viewto show an in-line trial offer
First up, let's cover how to wrap a UIViewController instance
of a Superwall paywall and present it in SwiftUI. Here's what the flow
looks like:
- We'll retrieve a paywall using the Superwall SDK.
-
Then, we'll insert that into a
UIViewControllerRepresentable. -
We'll specify that the representable should respect the
SwiftUIlayout and sizing system. - Finally, we'll display that when and however we want.
After that's covered, we'll look at an example demonstrating how you can
achieve the same result using plain SwiftUI — skipping the need to use and
wrap UIViewController if you prefer. However, it's good to know
how it's all working behind the scenes.
Let's dive in.
Getting a paywall controller
The Superwall SDK presents paywalls using a UIViewController,
which is a UIKit type. That's not a problem for SwiftUI apps,
since there is full support for embedding them in a SwiftUI
View.
First up, you'll want to retrieve the paywall using the
Superwall.shared.getPaywall(forEvent:params:) method. This
allows you to get the paywall controller for the placement you provide.
Here's a short example of how it works, and we'll build off of it:
func getPaywallFor(event: String) async {
    do {
        // Get the paywall that would show for a given placement...
        let result = try await Superwall.shared.getPaywall(forEvent: event, delegate: self)
        self.paywallController = result
    } catch let skippedReason as PaywallSkippedReason {
        switch skippedReason {
        case .holdout,
             .noRuleMatch,
             .eventNotFound,
             .userIsSubscribed:
            showAlternateUI.toggle()
            break
        }
    } catch {
        print(error)
    }
}
That's the basics — give Superwall the placement that would result in a
paywall being shown, and get the instance of it. The
getPaywall(forEvent:delegate:) also requires a delegate, which
will tell us useful things like reasons why a paywall wasn't retrieved.
We'll go over those details in a second.
With that in mind, to integrate with SwiftUI we'll use the
Observable framework to house some logic that'll cover error
handling, informing SwiftUI when the controller is retrieved and more. For
many cases, you could copy and paste this class into your own app to handle
custom paywall presentation and tweak it as you see fit:
@Observable
class PaywallFetchManager: PaywallViewControllerDelegate {
    // 1
    var paywallController: UIViewController? = nil
    // 2
    var showAlternateUI: Bool = false
    // 3
    var userHasAccess: Bool = false
    // 4
    var skipReason: PaywallSkippedReason? = nil

    func getPaywallFor(event: String) async {
        do {
            let result = try await Superwall.shared.getPaywall(forEvent: event, delegate: self)
            self.paywallController = result
        } catch let skippedReason as PaywallSkippedReason {
            switch skippedReason {
            case .holdout,
                 .noRuleMatch,
                 .eventNotFound,
                 .userIsSubscribed:
                self.skipReason = skippedReason
                break
            }
        } catch {
            print(error)
            showAlternateUI.toggle()
        }
    }

    // MARK: Paywall Delegate

    func paywall(_ paywall: SuperwallKit.PaywallViewController,
                 didFinishWith result: SuperwallKit.PaywallResult,
                 shouldDismiss: Bool) {
        if shouldDismiss {
            paywall.dismiss(animated: true)
        }

        switch result {
        case .purchased,
                .restored:
            self.userHasAccess.toggle()
        case .declined:
            let closeReason = paywall.info.closeReason
            let featureGating = paywall.info.featureGatingBehavior
            if closeReason != .forNextPaywall && featureGating == .nonGated {
                self.userHasAccess.toggle()
            }
        }
    }
}
Now, we could use an instance of this in our SwiftUI app to handle retrieving a paywall. Another thing to note here is this process is fast, since most of the time — the paywall is cached. Here's a few notes about the comments:
-
This will represent the
UIViewControllerof the paywall we fetched. Since, again, we're using the Observation framework, when it's set SwiftUI can react to that and show a controller. -
If there was an error, you may want to show another
Viewor change your user experience. - If the paywall shouldn't show because a user has access to a feature, or it's non-gated — then the Superwall SDK won't return a controller. Basically, the user has the "pro" feature and no paywall should show. This will occur in our delegate callback if the user purchases something from the paywall we show, too.
- Similar to point #3 above, but you'll get the specific reason here which is useful if you need more fine-grain control over the process.
You may not use each of those flags, but I provided them for completeness.
Here's a quick example of what it all would look like hooked up:
struct MyView: View {
    @State private var manager: PaywallFetchManager = .init()

    var body: some View {
        VStack {
            if let controller = manager.paywallController {
                // Show a representable of the controller
            } else {
               // Look at the error, or skip reason, and show something else
            }
        }
        .task {
            await manager.getPaywallFor(event: "some_placement")
        }
    }
}
Creating a representable
Now, we'll need to wrap this in a UIViewControllerRepresentable
so we can use it in SwiftUI:
struct SuperwallPaywallViewController: UIViewControllerRepresentable {
    typealias UIViewControllerType = UIViewController

    var paywallController: UIViewController

    func makeUIViewController(context: Context) -> UIViewController {
        return paywallController
    }

    func updateUIViewController(_ uiViewController: UIViewController, context: Context) {
        // Any update logic you might need. In most cases, you won't need this
    }

    func sizeThatFits(_ proposal: ProposedViewSize, uiViewController: UIViewController, context: Context) -> CGSize? {
        guard
            let width = proposal.width,
            let height = proposal.height
        else { return nil }

        return CGSize(width: width, height: height)
    }
}
As we'll see in a minute, in some cases you may want to size the paywall in
a particular way. To account for that, we'll need to forward that layout
data to the representable. The
sizeThatFits(_:uiViewController:context:) function takes care
of that for us.
With that, we've got everything in place. Let's see the code for how to present our paywall controller in a native navigation stack, and in an embedded view.
Presenting in a navigation stack
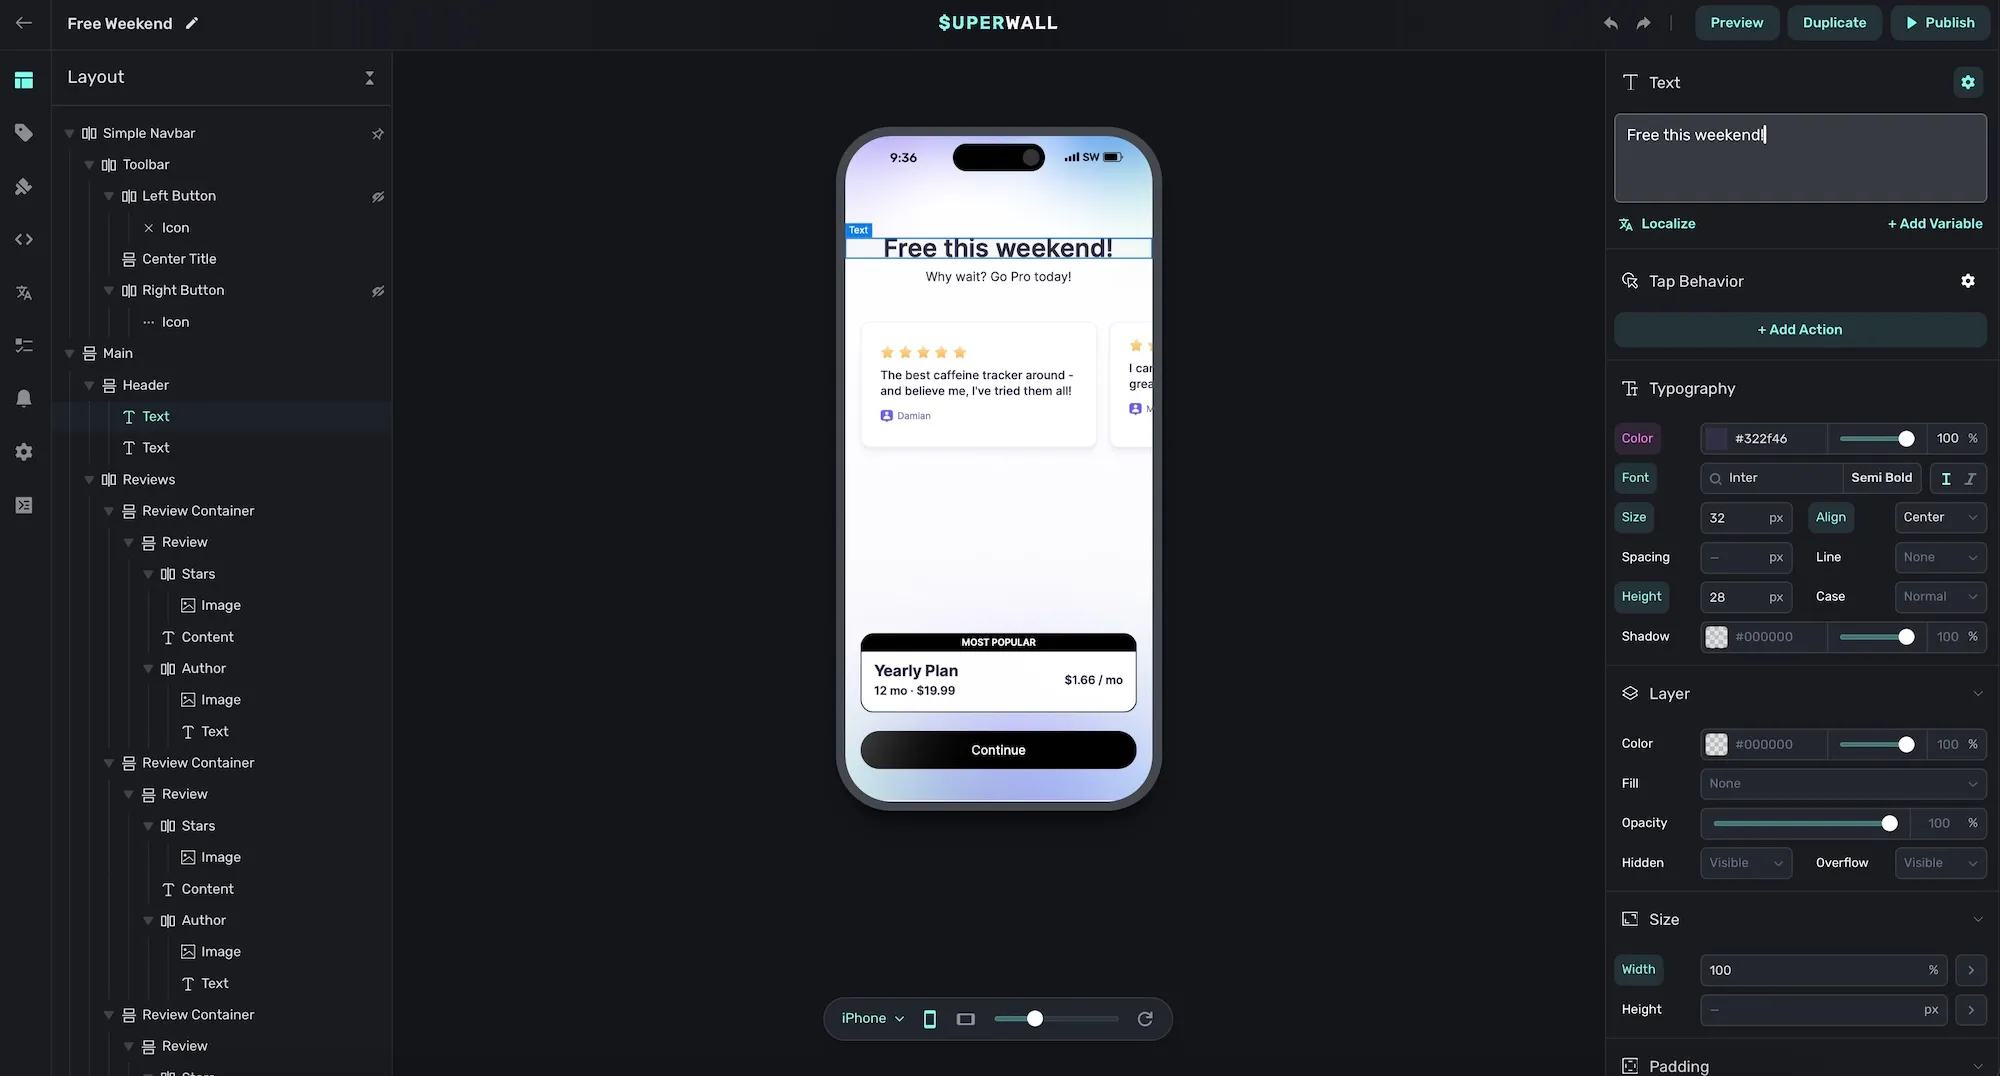
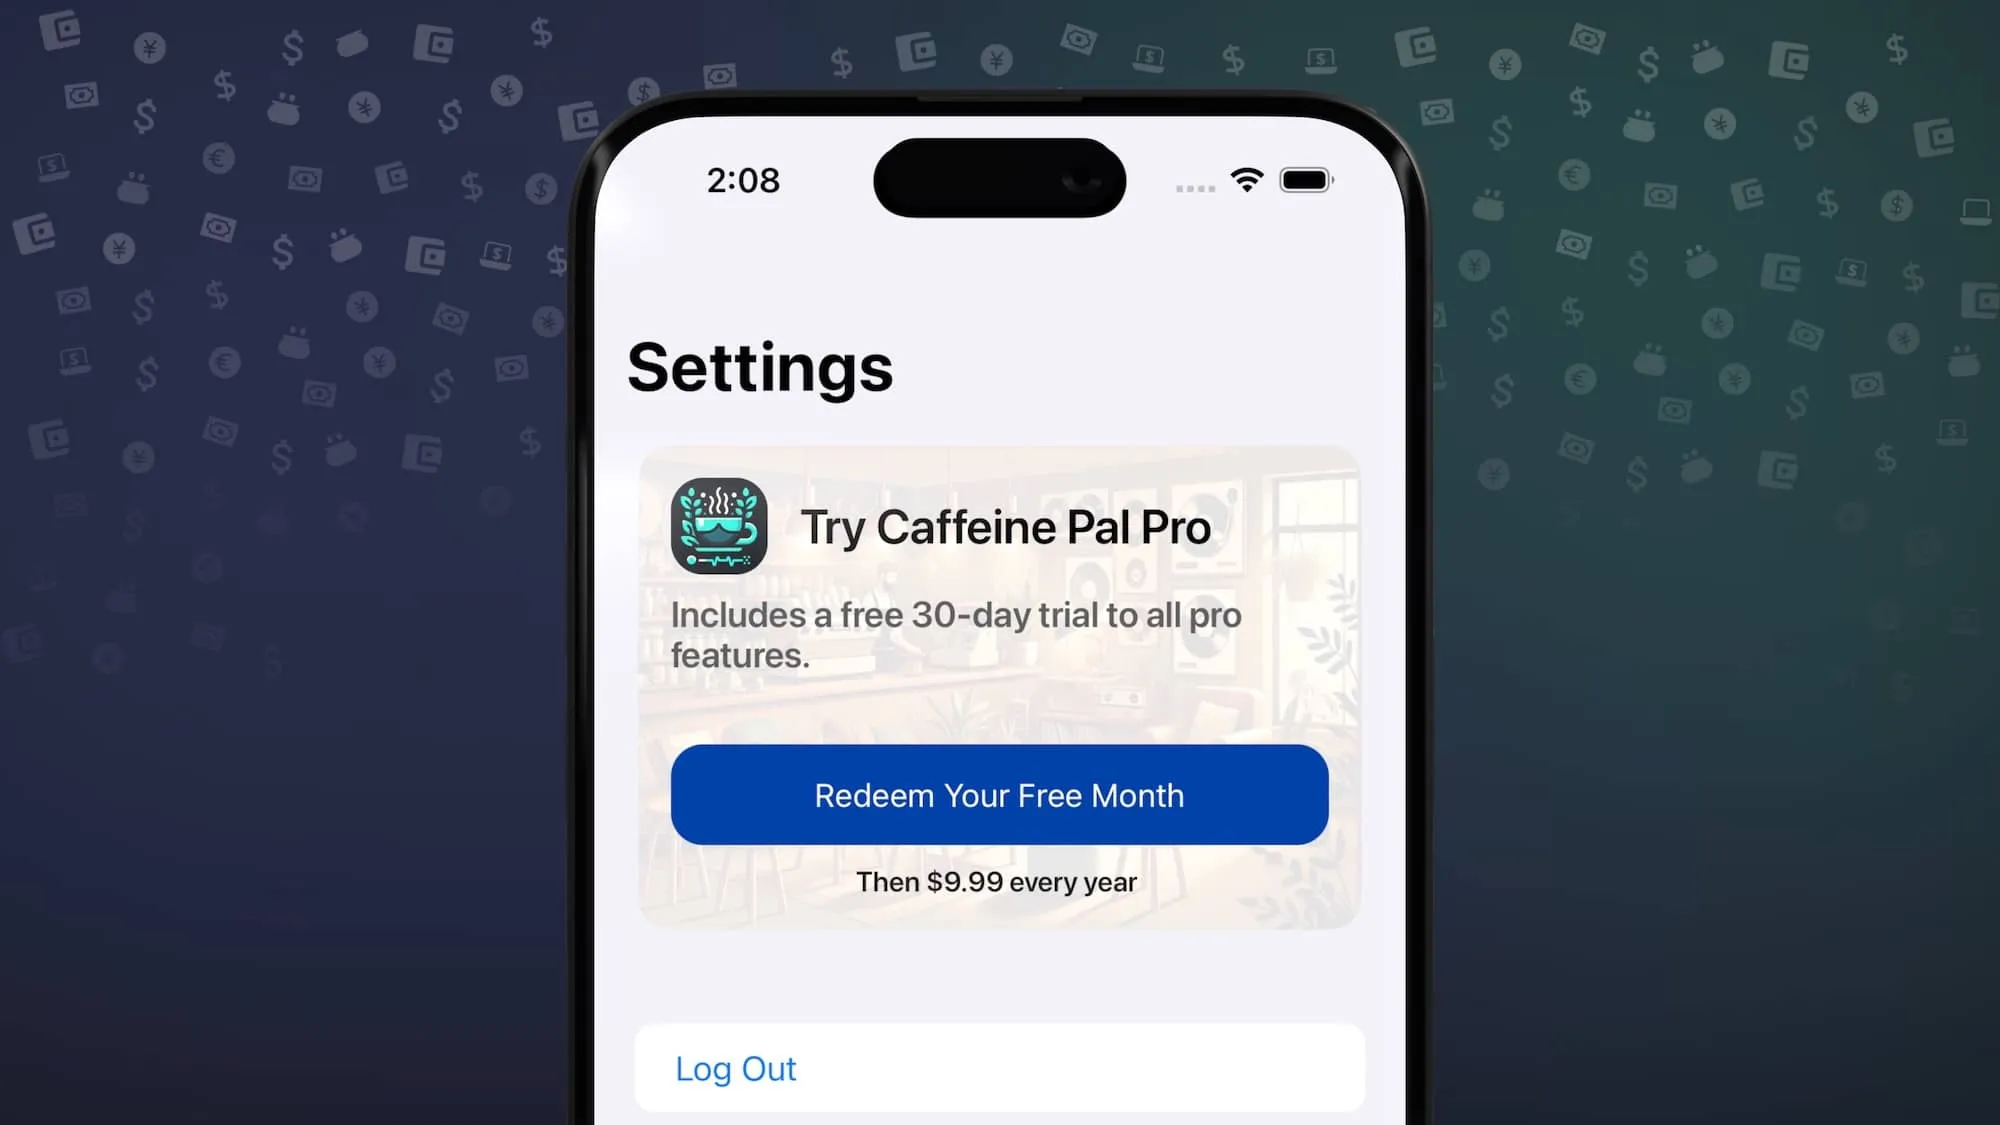
Here's the paywall I'd like to show in a navigation stack:
We'll follow the flow outlined above — fetch the paywall, and use in a
native NavigationLink:
// Root of the navigation stack...
struct AccountsView: View {
    var body: some View {
        NavigationStack {
            Form {
                // Existing UI
                NavigationLink("Account Settings") {
                    AccountSettingsViewExample()
                }
            }
        }
    }
}

struct AccountSettingsViewExample: View {
    @Environment(PaywallFetchManager.self) private var manager

    var body: some View {
        Form {
            Section {
                VStack {
                    // Show the paywall during a push
                    NavigationLink("View Pro Benefits") {
                        if let c = manager.paywallController {
                            SuperwallPaywallViewController(paywallController: c)
                                .edgesIgnoringSafeArea(.all)
                        } else {
                            FallbackPaywallView()
                        }
                    }
                    .foregroundStyle(.blue)
                }
            }
            // More UI code...
        }
        .task {
            // Fetch the paywall
            await manager.getPaywallFor(event: "caffeineLogged")
        }
    }
}
And that's it! Notice how we get all of the benefits of a native navigation stack, such as holding down the back button to pop to different views that are on the stack.

Presenting an embedded call-to-action
Another effective use-case is to show a paywall with a clear call-to-action embedded in another view. Slopes wrote extensively about how going straight to the payment sheet (like Apple Arcade does) drove up trial starts.
We can do the same thing here. First, we'll create a paywall in our editor with two things in mind:
- We'll make sure the user interface is centered.
- And, we'll give it an explicit height, and make sure it takes up with viewport's entire width.
Here's the example I came up with:
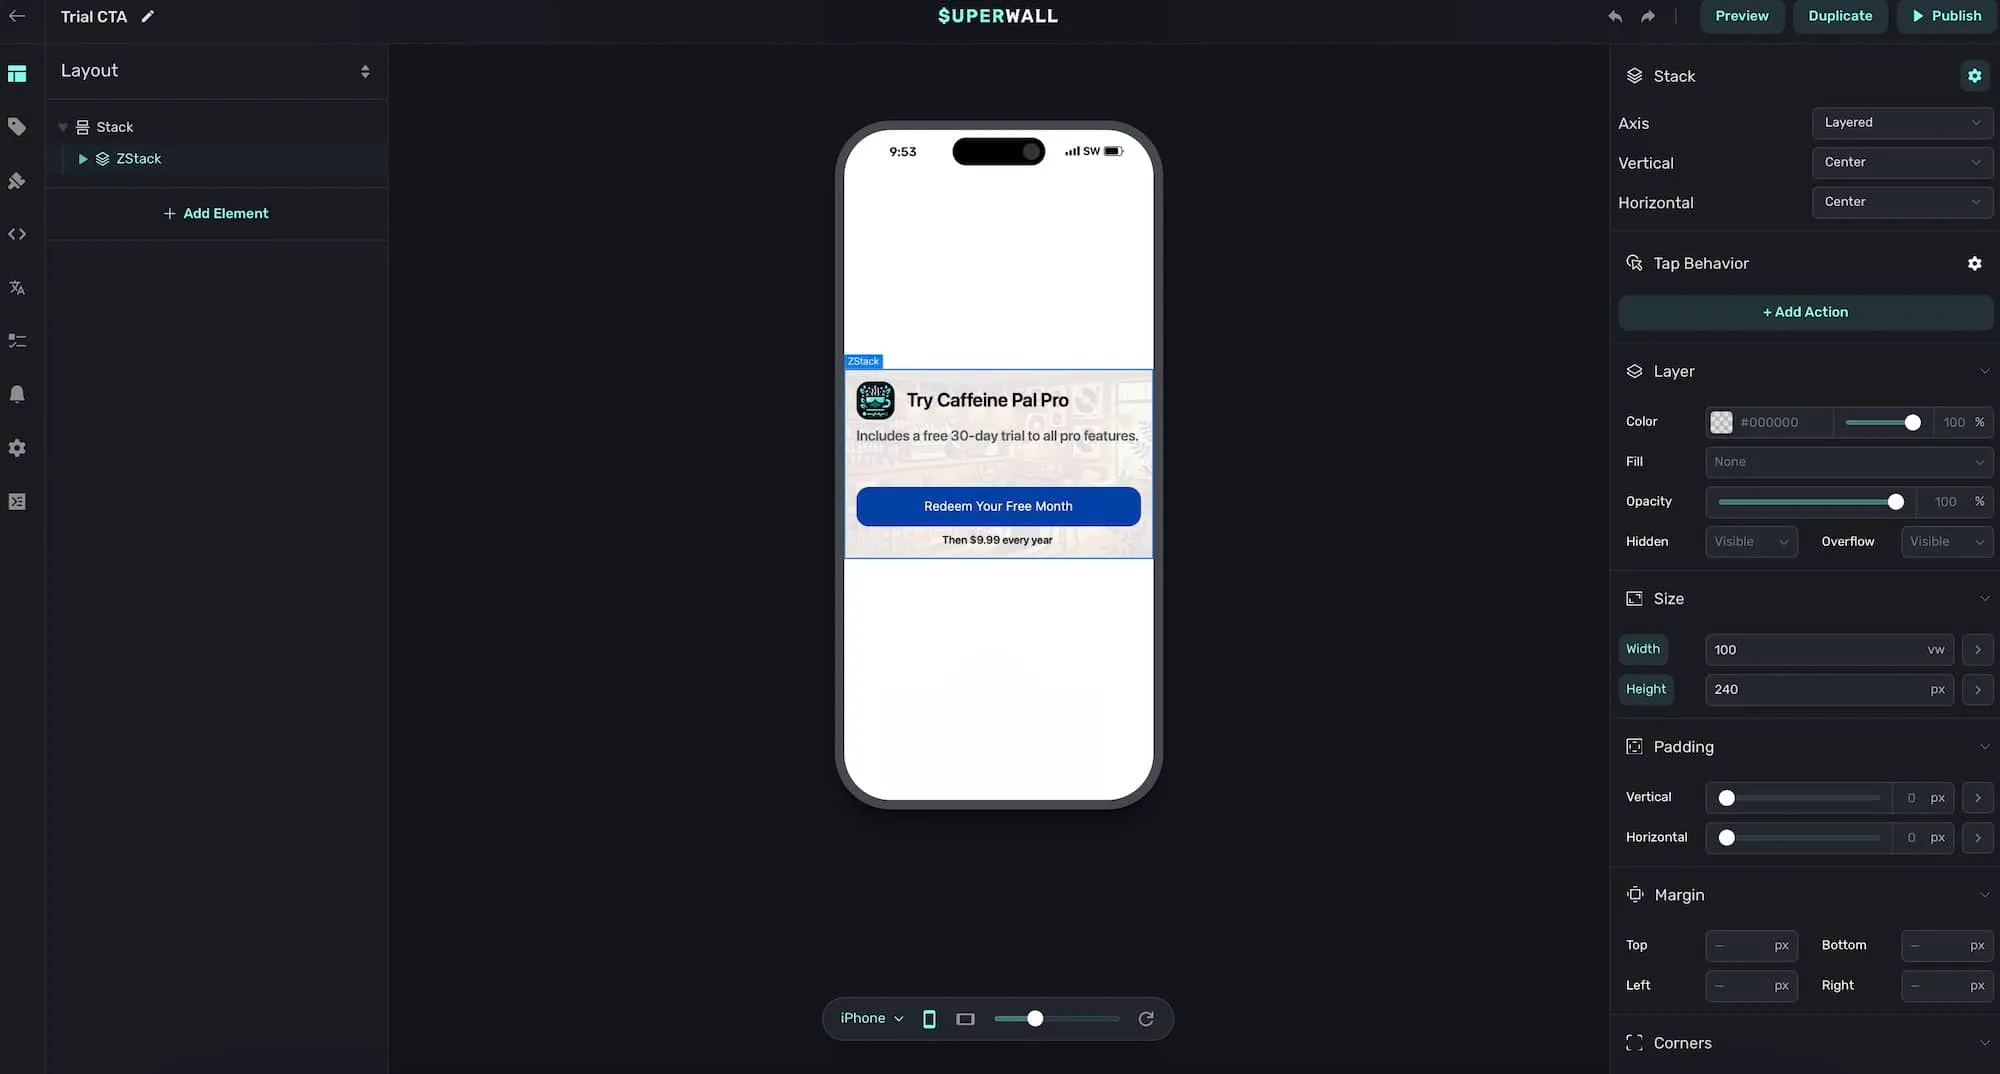
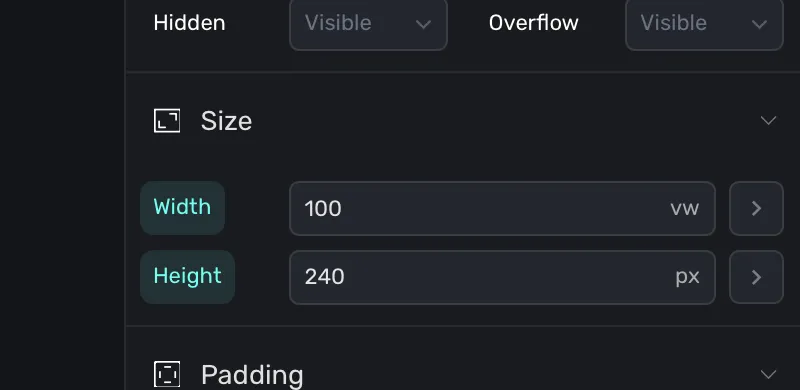
Again, notice the sizing I've set for the containing stack (100% of the viewport width, and a clear height of 240 pixels).
With that set, here's how we'd show that in our SwiftUI app:
struct OnRampView: View {
    @Environment(PaywallFetchManager.self) private var manager

    var body: some View {
        ZStack {
            if manager.userHasAccess {
                MembershipView()
            } else if let controller = manager.paywallController {
                SuperwallPaywallViewController(paywallController: controller)
                    .frame(height: 240)
                    .clipShape(.rect(cornerRadius: 16))
            } else {
                EmptyView()
            }
        }
        .task {
            await manager.getPaywallFor(event: "showOnRamp")
        }
    }
}
Notice the 240 points of height we used here, and in the paywall editor. Now, users can start a trial right there, without opening anything else.
Using only SwiftUI
Finally, let's see how we could achieve those same results using only
SwiftUI. No wrapped controllers, delegates or anything else is required. In
the latest versions of our SDK, there is a new PaywallView and
it works like this:
- You supply the placement to evaluate and a feature block to fire.
- And, optionally, data like placement parameters, views to show during errors, or when the paywall shouldn't be displayed.
The API looks like this, in its simplest terms:
PaywallView(event: "myPlacement") {
    // Feature block
}
That's equivalent to:
Superwall.shared.register(event: "placement") {
    // Feature block
}
However, with PaywallView — you can use pure SwiftUI design
patterns around presentation, modifiers, and more. For our two examples,
the code can be simplified (removing the need to check for an optional view,
getting the paywall using a placement inside a Task, etc.) and
the views simply switched out:
- Navigation stack example:
NavigationLink("View Pro Benefits") {
    PaywallView(event: "caffeineLogged")
}- Embedded call-to-action example:
struct OnRampView: View {
    @Environment(PaywallFetchManager.self) private var manager

    var body: some View {
        ZStack {
            if manager.userHasAccess {
                MembershipView()
            } else  {
                PaywallView(event: "showOnRamp")
                    .frame(height: 240)
                    .clipShape(.rect(cornerRadius: 16))
            }
        }
    }
}
From an implementation standpoint, if you're in a SwiftUI project — this is the ideal API to use if you need to manage presentation in a more hands-on manner. As with either approach, though, be sure to handle situations where the paywall shouldn't show (when the user is subscribed, an error, etc):
PaywallView(event: "somePlacement", onSkippedView: { skip in
    switch skip {
    case .userIsSubscribed,
         .holdout(_),
         .noRuleMatch,
         .eventNotFound:
        // Handle however you see fit
        // Return a View or dismiss
        EmptyView()
    }
}, onErrorView: { error in
    ErrorView(error)
}, feature: {
    navigate(to: .someFeature)
})
Remember, if you don't have any particular presentation considerations or
modifiers to apply to the view — simply rely on the register
calls from Superwall to present paywalls.
Wrapping it up
Manually retrieving and presenting paywalls with Superwall gives you the flexibility to tailor the paywall experience to your app's needs. Whether you use the built-in presentation options or create your own custom flow, the SDK provides the tools you need to integrate paywalls seamlessly into your app's workflow.
Superwall is the best way to test these kinds of experiences. Next, you should try these techniques out with different paywall designs and products with just a few clicks. Testing them will help you grow your revenue. If you haven't started with Superwall, you can for free — just sign up right here.