Testing Subscriptions and In-App Purchases for iOS Apps Before Launch
Want to easily test subscriptions, parental approval states and more before you launch? Here's how using Xcode's Transaction Manager.
Testing out purchases and subscription logic is a critical step to developing any iOS app. Today, I wanted to walk you through a few tips on how to make sure subscriptions are working properly before you launch. Beyond performing a purchase, there are several other edge cases to consider on iOS:
- How does your app behave if the network conditions are poor?
- What if the purchase requires parental approval?
- How do you inspect transactions once they complete?
Apple has thought of all of these scenarios, and they offer two indispensable tools every developer should know about:
- StoreKit Configuration Files: This is a file which represents products that you'll offer in your app. The great thing about using one is that they can be completely detached from Apple's servers, meaning you can create ad-hoc products. Or, you can use it to represent the products you've made in App Store Connect one to one.
- Transaction Manager: Xcode's built-in tool to test, manage or otherwise mimic any purchasing state is called the Transaction Manager. Here, you can see transactions, remove them, put them in different states and more.
With those two things, you'll have all you need to test any purchase-related logic. These tools give developers access to representations of real products (using the StoreKit file) and a way to view a running history of them, remove them and more (using Transaction Manager). For the rest of the post, you'll see concrete examples of how to use these two tools together. But, if you're new to iOS — I'd suggest starting with our guide on releasing your first iOS app, which takes you from App Store Connect to TestFlight and everything in-between.
First, write your subscription or purchasing logic
Whether you're using StoreKit 2, Superwall or something else — you'll need your logic in place to purchase a product. The "how" is not the focus of this post, testing what's been purchased is. To set the context here, though, I'll be using our demo app, Caffeine Pal. It uses StoreKit 2 (which I wrote an extensive tutorial about over here). Here's the critical component to making a purchase:
// MARK: Private Functions

private func purchaseProduct(_ product: Product) async throws -> Bool {
    do {
        let result = try await product.purchase()

        switch result {
        case .success(let result):
            let verificationResult = try self.verifyPurchase(result)
            try await updateUserPurchases()
            await verificationResult.finish()

            return true
        case .userCancelled:
            print("Cancelled")
        case .pending:
            print("Needs approval")
        @unknown default:
            fatalError()
        }

        return false
    } catch {
        throw error
    }
}
StoreKit configuration setup
Next, you need to create a StoreKit configuration file: Xcode -> File -> New from Template -> StoreKit Configuration File -> Next and then name it.
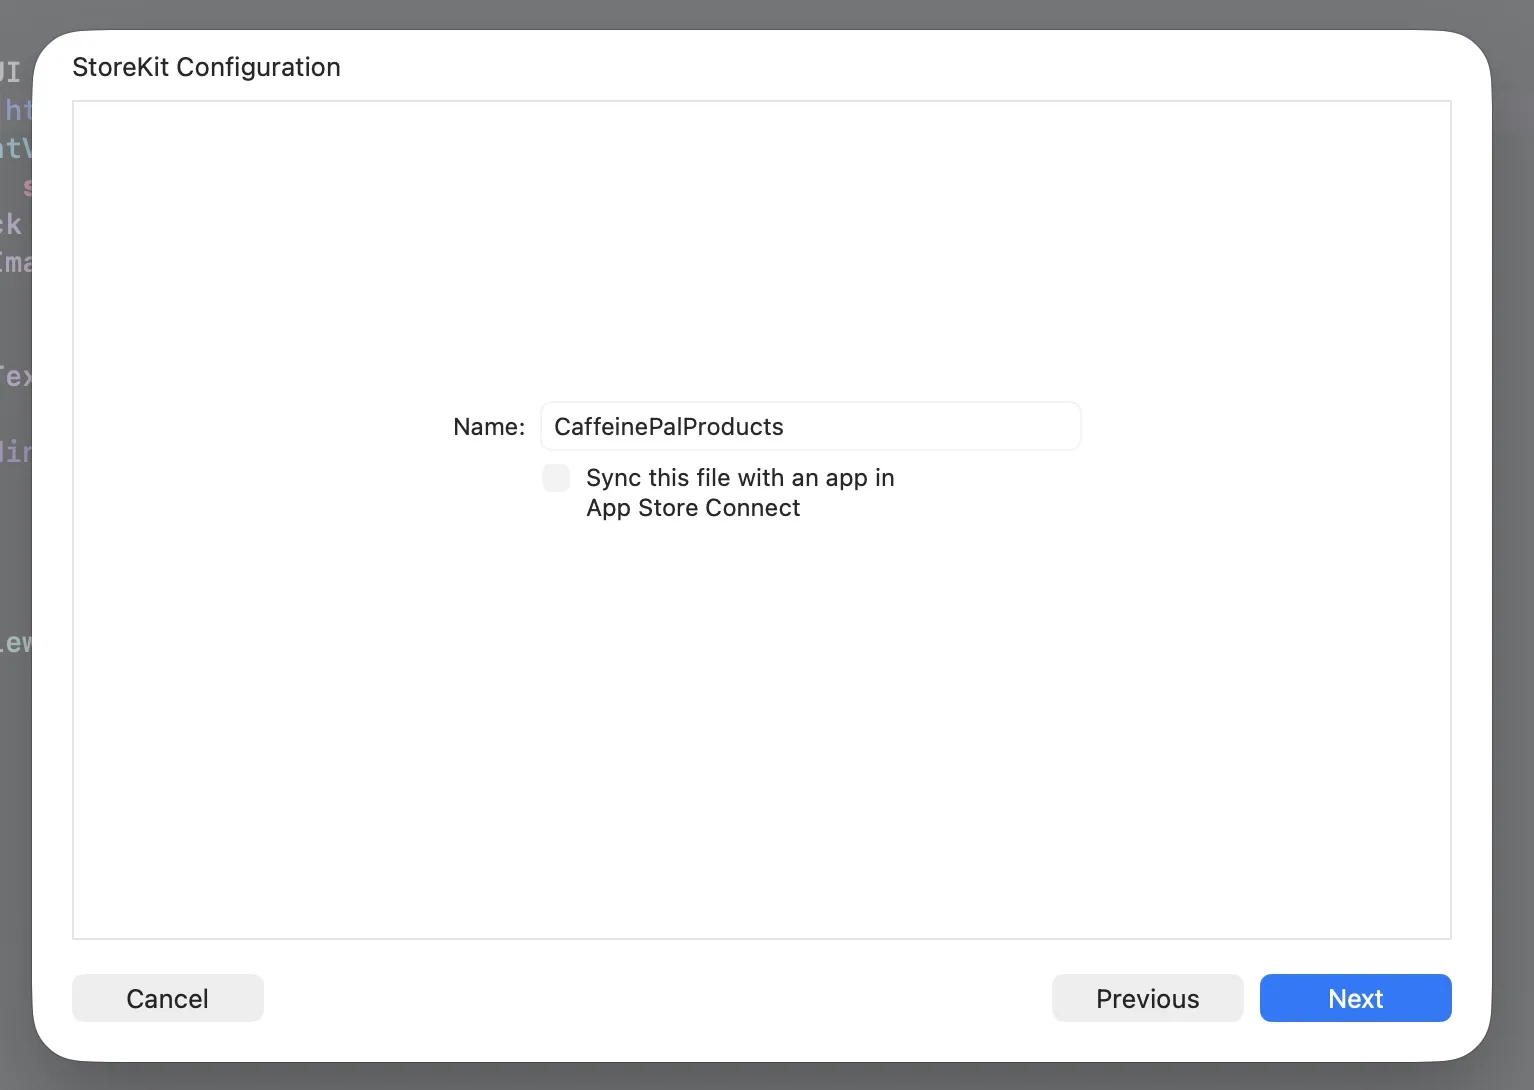
At this point, you can check the box to have it sync with the products
you've already added in App Store Connect, or leave it unchecked if you'll
be adding in your own manually. You can also have more than one
configuration file, though only one can be active at a time. For Caffeine
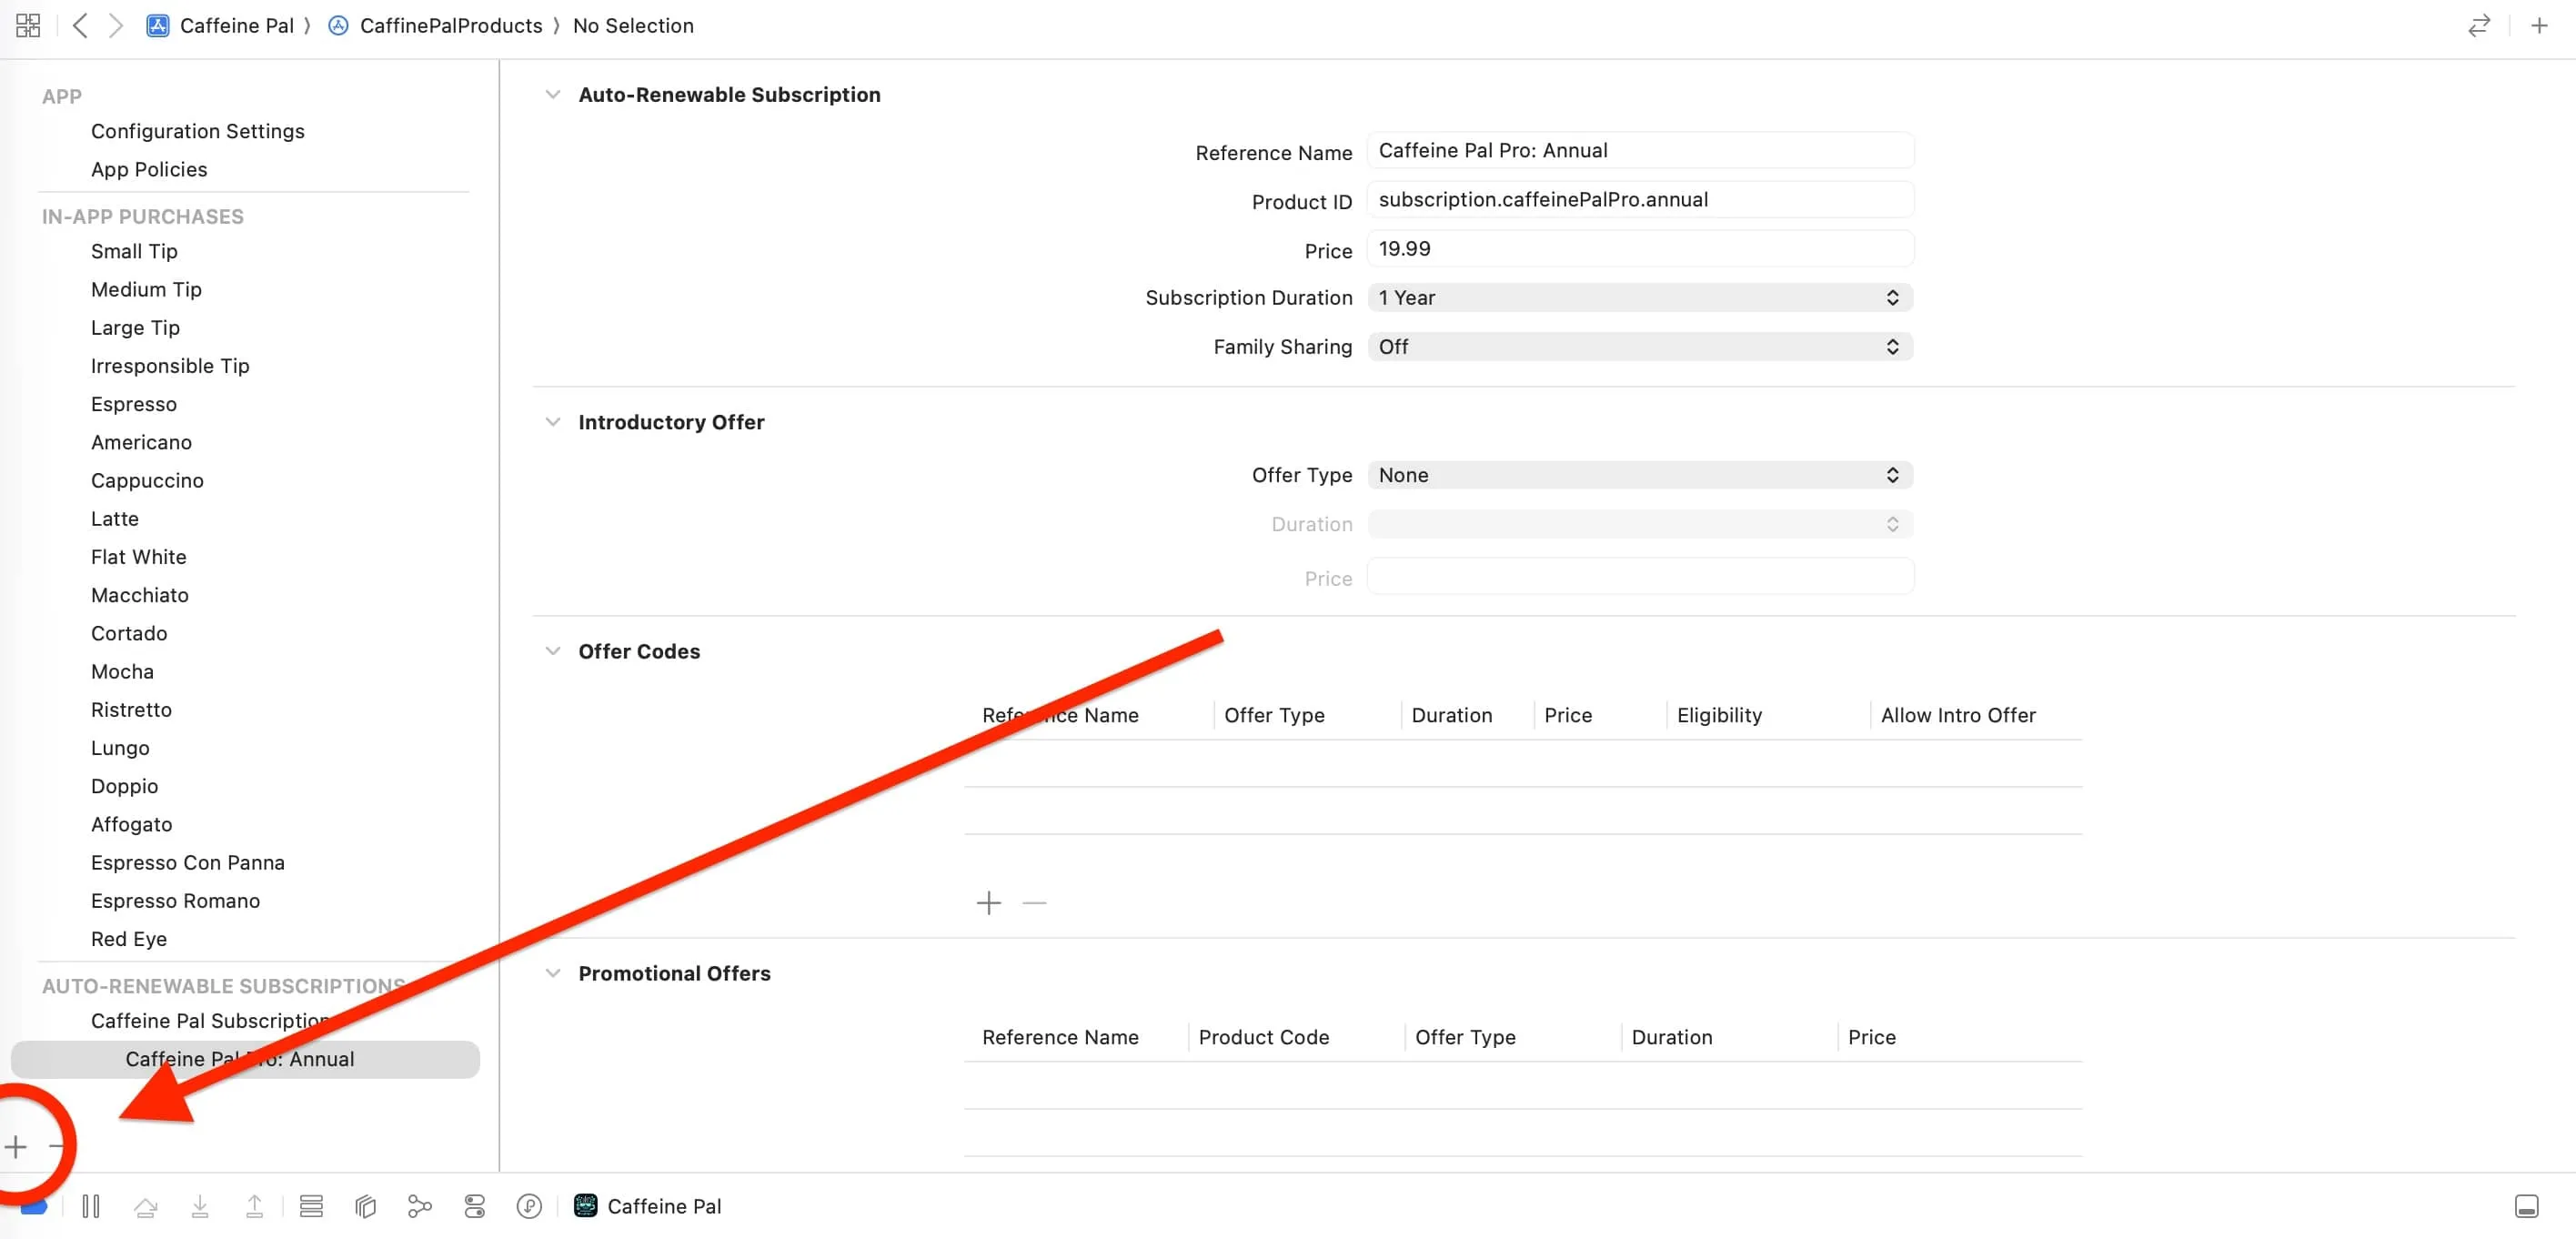
Pal, I added all of the products found in PurchaseOperations.swift. If you wanted to add your own, you could click the +
down here (if you synced with App Store Connect, it'll look like a refresh
circle instead).
Associating to a scheme
Now, you'll want to make the file active by associating it to a scheme. You have two options here:
- Create a new scheme: You can have a scheme in Xcode that's created solely for testing purchases.
- Use an existing scheme: Or, use an existing scheme and attach the file to it.
For my own projects, I go with option one — but it's a personal preference. Either way, you'll need to click on the scheme -> Edit Scheme -> Run -> Options -> StoreKit Configuration -> Choose your file.

Perform a purchase
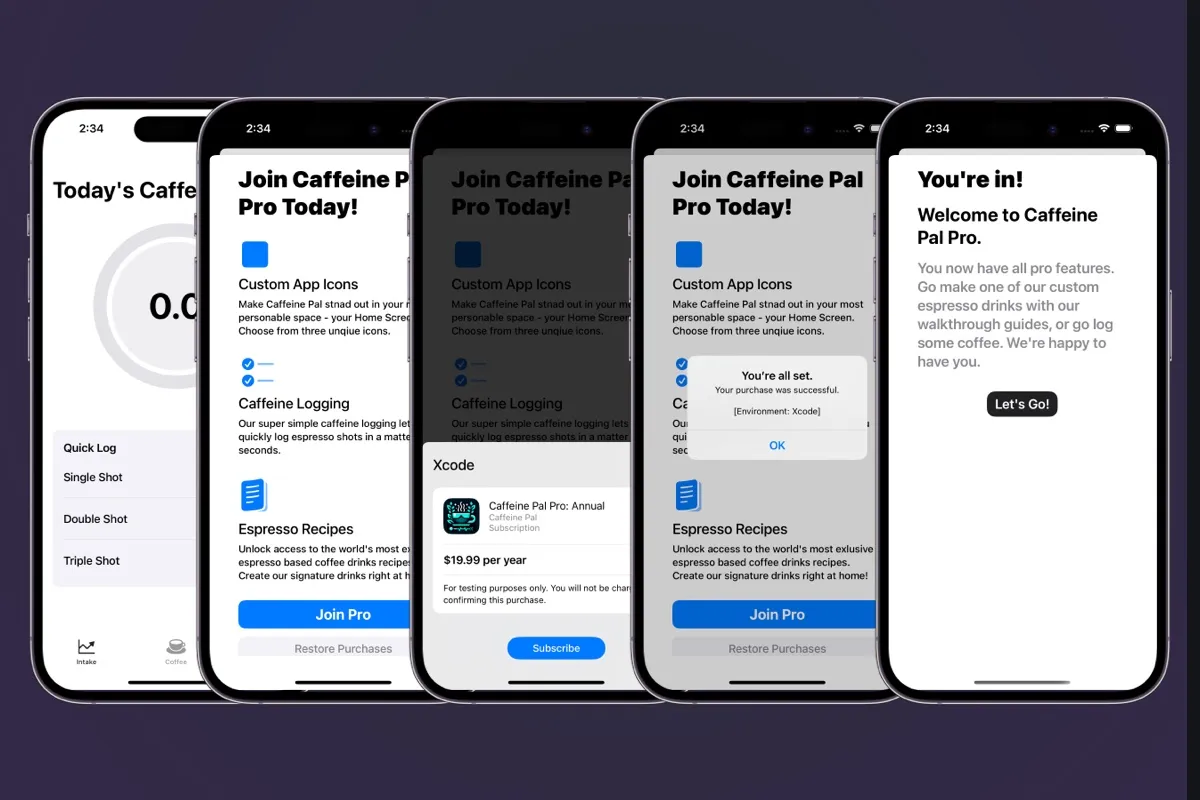
At this point, you're all set to ensure a purchase goes through. In Caffeine Pal, we'll make sure that a few core flows work as intended:
- Tapping on a "pro" feature should show a paywall. This confirms we're checking subscription state for inactive users.
- The paywall shows with the products required. This confirms our products are loading.
- The purchase itself is carried out. This, obviously, confirms users can convert.
- Finally, we have app-specific logic to show a "Welcome" view once a subscription starts. If a user converts, we need to confirm that shows post-purchase.
With the StoreKit configuration file activated with the scheme, you should be able to follow that same flow successfully if you've pulled down the project from Github.
The takeaway here is that with a StoreKit configuration file, you can easily test any product you can think of — without dealing with the logistical hurdles that creating a product in App Store Connect can present. The fact that it can work with your "real" products, or any you create on the fly, make it a critical tool for developing apps on Apple's platforms.
Viewing, editing and removing transactions
Finally, we arrive at the Transaction Manager. Before it came around, dealing with "resetting" state, testing parental approval flows and anything else with subscriptions or purchases was a bit of a chore. Now, it's a click of a button.
Since a conversion occurred in the previous step, it'll be viewable (and editable) in the Transaction Manager: Xcode -> Debug -> StoreKit -> Manage Transactions.
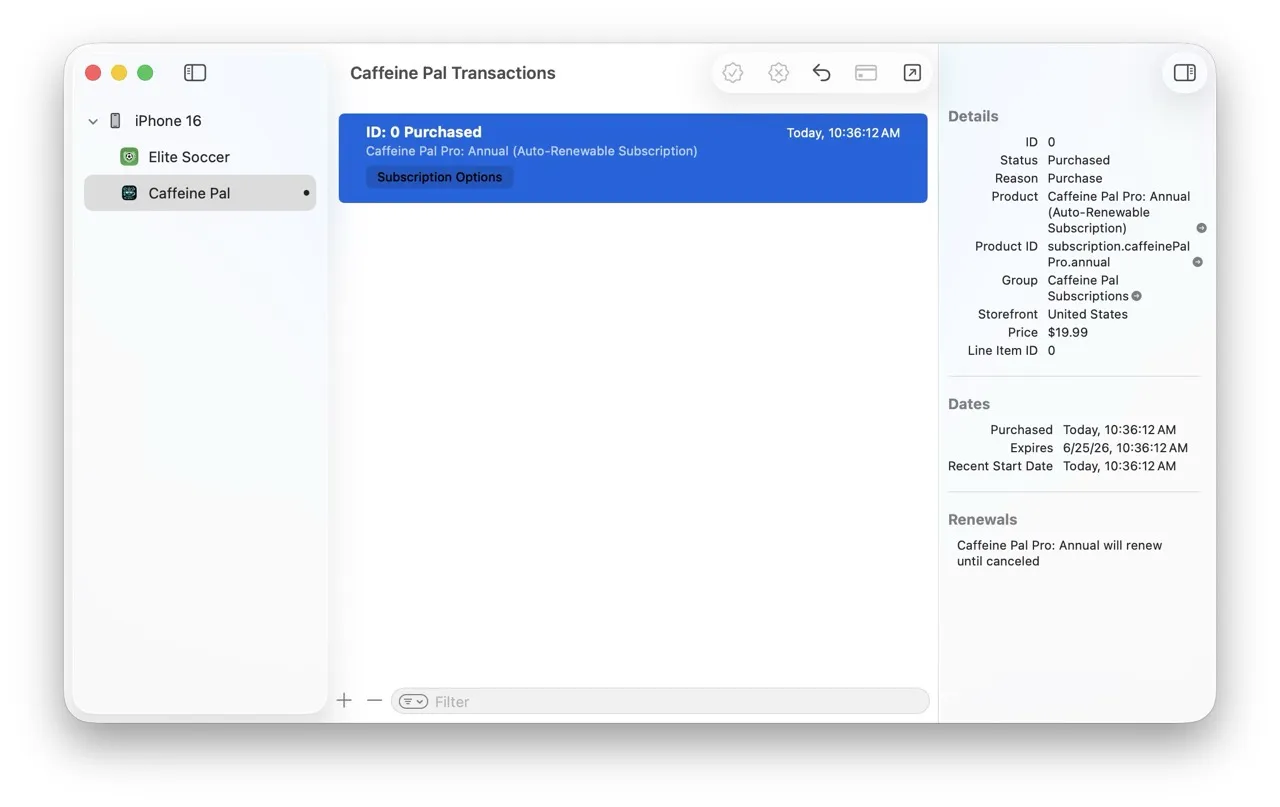
Make sure you select your app from the left-hand sidebar. Clicking on a specific transaction is where things get interesting. You can cancel the subscription, delete it altogether (i.e. resetting state, the most common use), request a price increase, refund it and more. Here, right click the transaction to bring up the context menu, and choose "Delete Transaction" and run the app again. You'll see that we no longer have access to pro features, and we can test the flow over again.
Keep in mind that this works for any transaction. So, if you have a credits-based system with consumable purchases, those work all the same. It's an incredibly flexible tool that can mimic any subscription or purchasing state possible on iOS.
For example, beyond the subscription tier in Caffeine Pal, there are also individual in-app purchases for espresso recipes available. Purchasing one shows up the exact same way that a subscription conversion does:
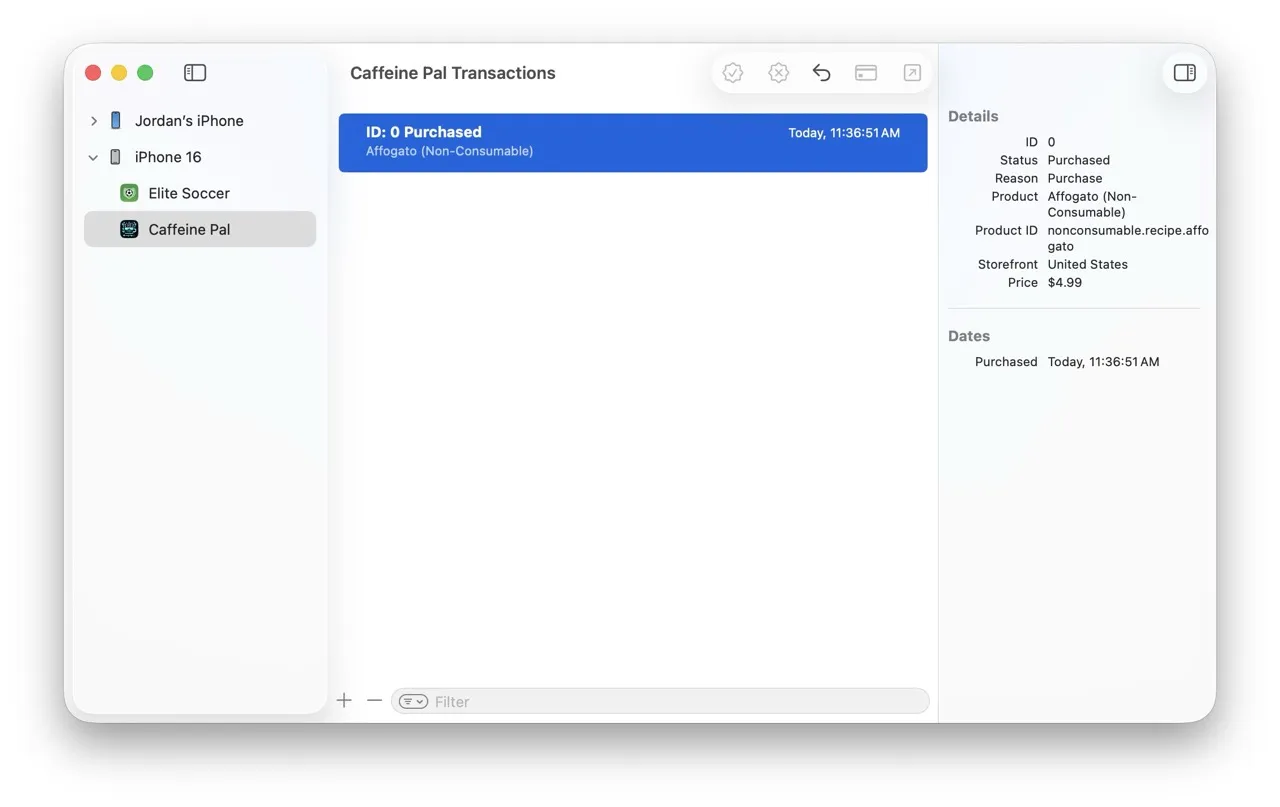
This means testing scenarios such as confirming that a subscription unlocks all recipes, or that without one — recipes are purchasing correctly, are all done within minutes.
Wrapping up
With StoreKit configuration files and Transaction Manager, it's never been easier to test subscription flows. What used to require a myriad of steps is now set up and done in a few minutes. If you're pre-launch (or testing new things even if you have launched), this is the quickest way to start testing purchasing flows. Once things look good, then you shuttle your app off to TestFlight or the App Store.
Other resources
If you want to dig in more, here are some great resources to check out:
- Our YouTube video over the Transaction Manager.
- Our docs page over setting these flows up (same information, but more succinct).
- Apple's article over StoreKit configuration files.
- Apple's article over Transaction Manager.
As always, if you want access to the best paywall testing suite, revenue charts or web checkout tools — get started with a free Superwall account today.